032.2 Lesson 1
Certificate: |
Web Development Essentials |
|---|---|
Version: |
1.0 |
Topic: |
032 HTML Document Markup |
Objective: |
032.2 HTML Semantics and Document Hierarchy |
Lesson: |
1 of 1 |
Introduction
In the previous lesson, we learned that HTML is a markup language that can semantically describe the content of a website. An HTML document contains a so-called skeleton that consists of the HTML elements <html>, <head>, and <body>. While the <head> element describes a block of meta information for the HTML document that will be invisible to the visitor to the website, the <body> element may contain many other elements to define the structure and content of the HTML document.
In this lesson, we will walk through text formatting, fundamental semantic HTML elements and their purpose, and how to structure an HTML document. We’ll use a shopping list as our example.
|
Note
|
All subsequent code examples lie within the |
Text
In HTML, no block of text should be bare, standing outside an element. Even a short paragraph should be wrapped in the <p> HTML tags, which is short name for paragraph.
<p>Short text element spanning only one line.</p>
<p>A text element containing much longer text that may span across multiple lines, depending on the size of the web browser window.</p>
Opened in a web browser, this HTML code produces the result shown in Figure 1.

By default, web browsers add spacing before and after <p> elements for improved readability. For this reason, <p> is called a block element.
Headings
HTML defines six levels of headings to describe and structure the content of an HTML document. These headings are marked by the HTML tags <h1>, <h2>, <h3>, <h4>, <h5> and <h6>.
<h1>Heading level 1 to uniquely identify the page</h1>
<h2>Heading level 2</h2>
<h3>Heading level 3</h3>
<h4>Heading level 4</h4>
<h5>Heading level 5</h5>
<h6>Heading level 6</h6>
A web browser renders this HTML code as shown in Figure 2.
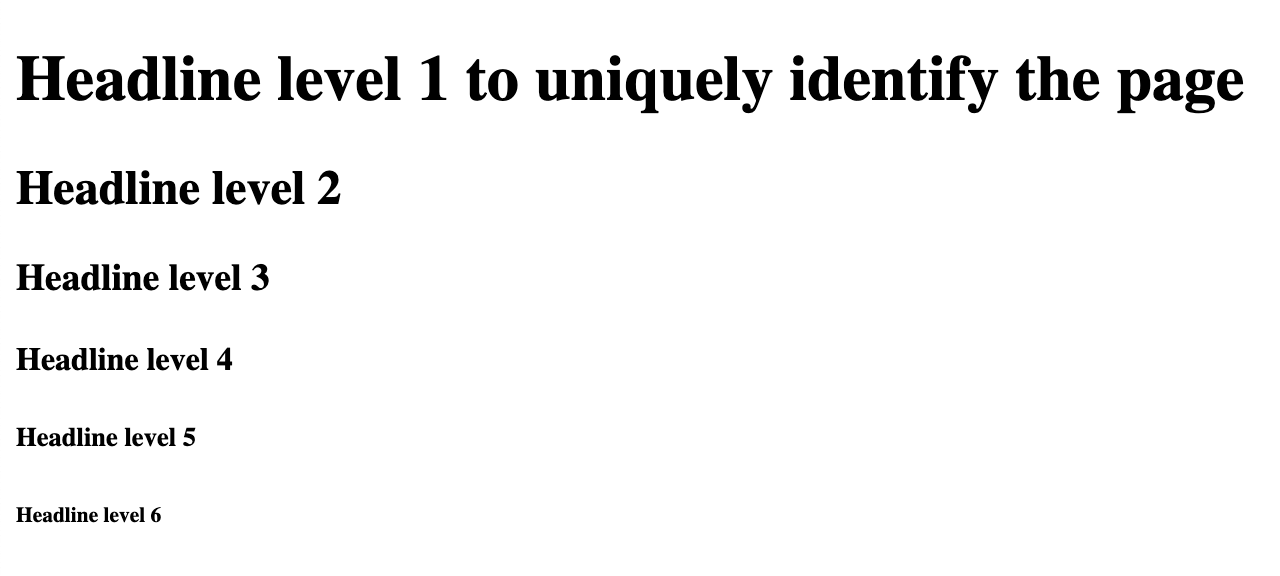
If you are familiar with word processors such as LibreOffice or Microsoft Word, you may notice some similarities in how an HTML document uses different levels of headings and how they are rendered in the web browser. By default, HTML uses size to indicate the hierarchy and importance of headings and adds space before and after every heading to visually separate it from content.
A heading using the element <h1> is at the top of the hierarchy and thus is considered the most important heading that identifies the content of the page. It’s comparable to the <title> element discussed in the previous lesson, but within the content of the HTML document. Subsequent heading elements can be used to further structure the content. Make sure not to skip heading levels in between. The document hierarchy should begin with <h1>, continue with <h2>, then <h3> and so on. You don’t need to use every heading element down to <h6> if your content does not demand it.
|
Note
|
Headings are important tools to structure an HTML document, both semantically and visually. However, headings should never be used to increase the size of otherwise structurally unimportant text. By the same principle, one should not make a short paragraph bold or italic to make it look like a heading; use heading tags to mark headings. |
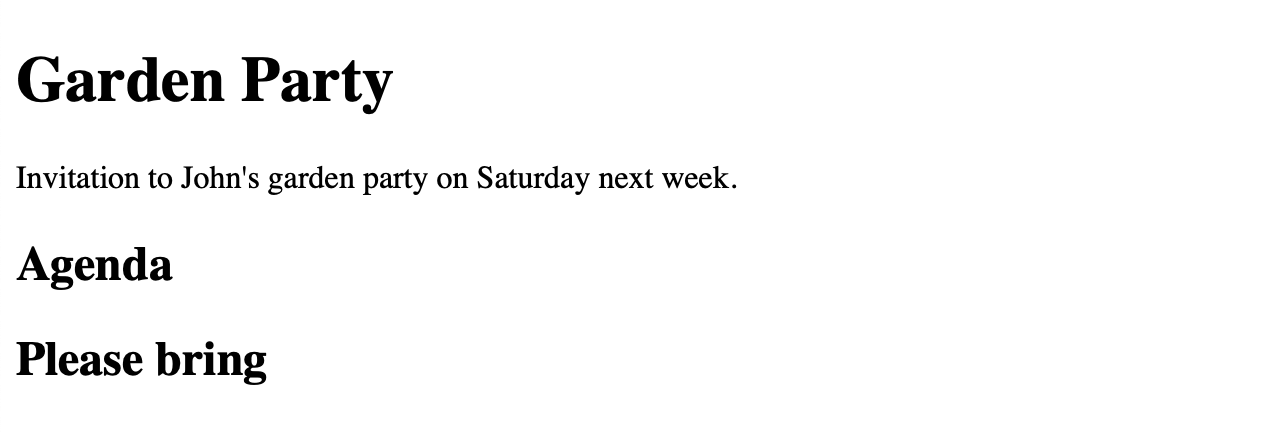
Let’s begin creating the shopping list HTML document by defining its outline. We will create an <h1> element to contain the page title, in this case Garden Party, followed by short information wrapped in a <p> element. Additionally, we use two <h2> elements to introduce the two content sections Agenda and Please bring.
<h1>Garden Party</h1>
<p>Invitation to John's garden party on Saturday next week.</p>
<h2>Agenda</h2>
<h2>Please bring</h2>
Opened in a web browser, this HTML code produces the result shown in Figure 3.
Line Breaks
Sometimes it may be necessary to cause a line break without inserting another <p> element or any similar block element. In such cases, you can use the self-closing <br> element. Note that it should be used only to insert line breaks that belong to the content, as is the case for poems, song lyrics, or addresses. If the content is separated by meaning, it is better to use a <p> element instead.
For example, we could split up the text in the information paragraph from our previous example as follows:
<p>
  Invitation to John's garden party.<br>
  Saturday, next week.
</p>
In a web browser, this HTML code produces the result shown in Figure 4.

Horizontal Lines
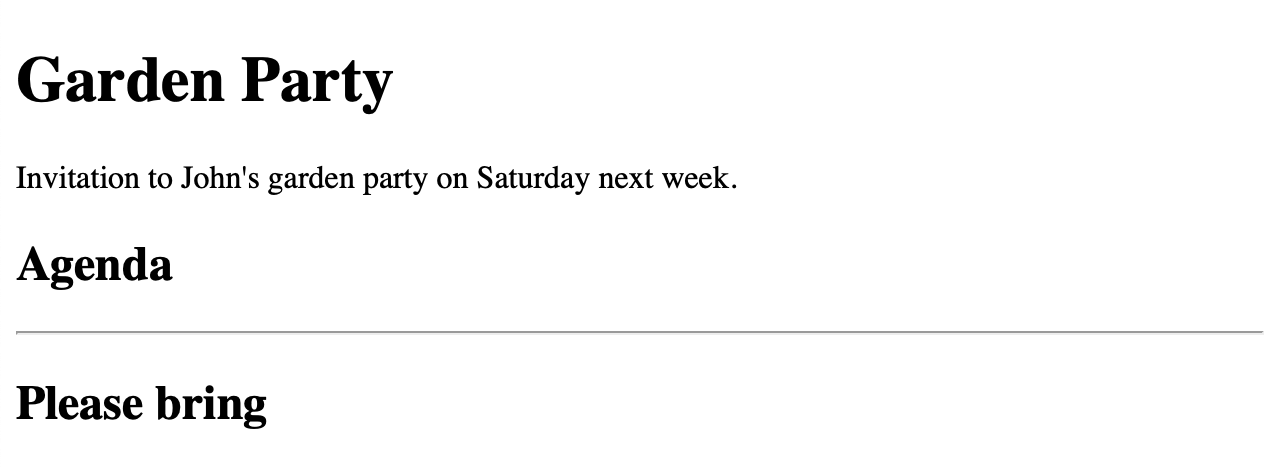
The <hr> element defines a horizontal line, also called a horizontal rule. By default, it spans the whole width of its parent element. The <hr> element can help you define a thematic change in the content or separate the sections of the document. The element is self-closing and therefore has no closing tag.
For our example, we could separate the two headings:
<h1>Garden Party</h1>
<p>Invitation to John's garden party on Saturday next week.</p>
<h2>Agenda</h2>
<hr>
<h2>Please bring</h2>
Figure 5 shows the result of this code.
HTML Lists
In HTML, you can define three types of lists:
- Ordered lists
-
where the order of the list elements matters
- Unordered lists
-
where the order of the list elements is not particularly important
- Description lists
-
to more closely describe some terms
Each contains any number of list items. We’ll describe each type of list.
Ordered Lists
An ordered list in HTML, denoted using the HTML element <ol>, is a collection of any number of list items. What makes this element special is that the order of its list elements is relevant. To emphasize this, web browsers display numerals before the child list items by default.
|
Note
|
|
For our example, we can fill in the agenda for the garden party using an <ol> element with the following code:
<h2>Agenda</h2>
<ol>
  <li>Welcome</li>
  <li>Barbecue</li>
  <li>Dessert</li>
  <li>Fireworks</li>
</ol>
In a web browser, this HTML code produces the result shown in Figure 6.

Options
As you can see in this example, the list items are numbered with decimal numerals beginning at 1 by default. However, you can change this behavior by specifying the type attribute of the <ol> tag. Valid values for this attribute are 1 for decimal numerals, A for uppercase letters, a for lowercase letters, I for Roman uppercase numerals, and i for Roman lowercase numerals.
If you want, you can also define the starting value by using the start attribute of the <ol> tag. The start attribute always takes a decimal numerical value, even if the type attribute sets a different type of numbering.
For example, we could adjust the ordered list from the previous example so that the list items will be prefixed with capital letters, beginning with the letter C, as shown in the following example:
<h2>Agenda</h2>
<ol type="A" start="3">
  <li>Welcome</li>
  <li>Barbecue</li>
  <li>Dessert</li>
  <li>Fireworks</li>
</ol>
Within a web browser, this HTML code is rendered like Figure 7.

The order of the list items can also be reversed using the reversed attribute without a value.
|
Note
|
In an ordered list, you can also set the initial value of a specific list item using the |
Unordered Lists
An unordered list contains a series of list items that, unlike those in an ordered list, do not have a special order or sequence. The HTML element for this list is <ul>. Once again, <li> is the HTML element to mark its list items.
|
Note
|
|
For our example web site, we can use the unordered list to list items for guests to bring to the party. We can achieve this with the following HTML code:
<h2>Please bring</h2>
<ul>
  <li>Salad</li>
  <li>Drinks</li>
  <li>Bread</li>
  <li>Snacks</li>
  <li>Desserts</li>
</ul>
Within a web browser, this HTML code produces the display shown in Figure 8.

By default, each list item is represented using a disc bullet. You may change its appearance using CSS, which will be discussed in later lessons.
Nesting Lists
Lists can be nested within other lists, such as ordered lists within unordered lists and vice versa. To achieve this, the nested list must be part of a list element <li>, because <li> is the only valid child element of unordered and ordered lists. When nesting, be careful not to overlap the HTML tags.
For our example, we could add some information of the agenda we created before, as shown in the following example:
<h2>Agenda</h2>
<ol type="A" start="3">
  <li>Welcome</li>
  <li>
    Barbecue
    <ul>
      <li>Vegetables</li>
      <li>Meat</li>
      <li>Burgers, including vegetarian options</li>
    </ul>
  </li>
  <li>Dessert</li>
  <li>Fireworks</li>
</ol>
A web browser renders the code as shown in Figure 9.

You could go even further and nest multiple levels deep. Theoretically, there is no limit to how many lists you can nest. When doing this however, consider readability for your vistors.
Description Lists
A description list is defined using the <dl> element and represents a dictionary of keys and values. The key is a term or name that you want to describe, and the value is the description. Description lists can range from simple key-value pairs to extensive definitions.
A key (or term) is defined using the <dt> element, while its description is defined using the <dd> element.
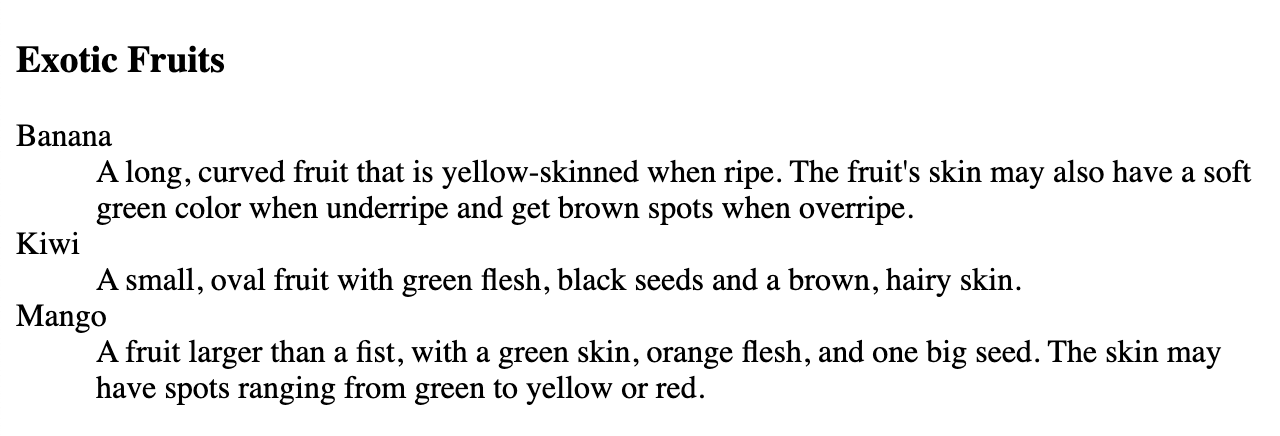
An example for such a description list could be a list of exotic fruits that explains what they look like.
<h3>Exotic Fruits</h3>
<dl>
  <dt>Banana</dt>
  <dd>
    A long, curved fruit that is yellow-skinned when ripe. The fruit's skin
    may also have a soft green color when underripe and get brown spots when
    overripe.
  </dd>

  <dt>Kiwi</dt>
  <dd>
    A small, oval fruit with green flesh, black seeds, and a brown, hairy
    skin.
  </dd>

  <dt>Mango</dt>
  <dd>
    A fruit larger than a fist, with a green skin, orange flesh, and one big
    seed. The skin may have spots ranging from green to yellow or red.
  </dd>
</dl>
In a web browser, this produces the result shown in Figure 10.
|
Note
|
As opposed to ordered lists and unordered lists, in a description list, any HTML element is valid as a direct child. This allows you to group elements and style them elsewhere using CSS. |
Inline Text Formatting
In HTML, you can use formatting elements to change the appearance of the text. These elements can be categorized as presentation elements or phrase elements.
Presentation Elements
Basic presentation elements change the font or look of text; these are <b>, <i>, <u> and <tt>. These elements were originally defined before CSS let make text bold, italic, etc. There are now usually better ways to alter the look of text, but you still see these elements sometimes.
Bold Text
To make text bold, you can wrap it within the <b> element as illustrated in the following example. The result appears in Figure 11.
This <b>word</b> is bold.
<b> tag is used to make text bold.According to the HTML5 specification, the <b> element should be used only when there are no more appropriate tags. The element that produces the same visual output, but additionally adds semantic importance to the marked text, is <strong>.
Italic Text
To italicize text, you can wrap it within the <i> element as illustrated in the following example. The result appears in Figure 12.
This <i>word</i> is in italics.
<i> tag is used to italicize text.According to the HTML 5 specification, the <i> element should be used only when there are no more appropriate tags.
Underlined Text
To underline text, you can wrap it within the <u> element as illustrated in the following example. The result appears in Figure 13.
This <u>word</u> is underlined.
<u> tag is used to underline text.According to the HTML 5 specification, the <u> element should be used only when there are no better ways to underline text. CSS provides a modern alternative.
Fixed-Width or Monospaced Font
To display text in a monospaced (fixed-width) font, often used to display computer code, you can use the <tt> element as illustrated in the following example. The result appears in Figure 14.
This <tt>word</tt> is in fixed-width font.
<tt> tag is used to display text in a fixed-width font.The <tt> tag is not supported in HTML5. Web browsers still render it as expected. However, you should use more appropriate tags, which include <code>, <kbd>, <var>, and <samp>.
Phrase Elements
Phrase elements not only change the appearance of text, but also add semantic importance to a word or phrase. Using them, you can emphasize a word or mark it as important. These elements, as opposed to presentation elements, are recognized by screen readers, which makes the text more accessible to visually impaired visitors and allows search engines to better read and evaluate the page content. The phrase elements we use throughout this lesson are <em>, <strong>, and <code>.
Emphasized Text
To emphasize text, you can wrap it within the <em> element as illustrated in the following example:
This <em>word</em> is emphasized.
<em> tag is used to emphasize text.As you can see, web browsers display <em> in the same way as <i>, but <em> adds semantic importance as a phrase element, which improves accessibility for visually impaired visitors.
Strong Text
To mark text as important, you can wrap it within the <strong> element as illustrated in the following example. The result appears in Figure 16.
This <strong>word</strong> is important.
<strong> tag is used to mark text as important.As you can see, web browsers display <strong> in the same way as <b>, but <strong> adds semantic importance as a phrase element, which improves accessibility for visually impaired visitors.
Computer Code
To insert a piece of computer code, you can wrap it within the <code> element as illustrated in the following example. The result appears in Figure 17.
The Markdown code <code># Heading</code> creates a heading at the highest level in the hierarchy.
<code> tag is used to insert a piece of computer code.Marked Text
To highlight text with a yellow background, similar to the style of a highlighter, you can use the <mark> element as illustrated in the following example. The result appears in Figure 18.
This <mark>word</mark> is highlighted.
<mark> tag is used to highlight text with a yellow background.Formatting the Text of our HTML Shopping List
Drawing on our previous examples, let’s insert some phrase elements to change the appearance of the text while also adding semantic importance. The result appears in Figure 19.
<h1>Garden Party</h1>
<p>
  Invitation to <strong>John's garden party</strong>.<br>
  <strong>Saturday, next week.</strong>
</p>

<h2>Agenda</h2>
<ol>
  <li>Welcome</li>
  <li>
    Barbecue
    <ul>
      <li><em>Vegetables</em></li>
      <li><em>Meat</em></li>
      <li><em>Burgers</em>, including vegetarian options</li>
    </ul>
  </li>
  <li>Dessert</li>
  <li><mark>Fireworks</mark></li>
</ol>

<hr>

<h2>Please bring</h2>
<ul>
  <li>Salad</li>
  <li>Drinks</li>
  <li>Bread</li>
  <li>Snacks</li>
  <li>Desserts</li>
</ul>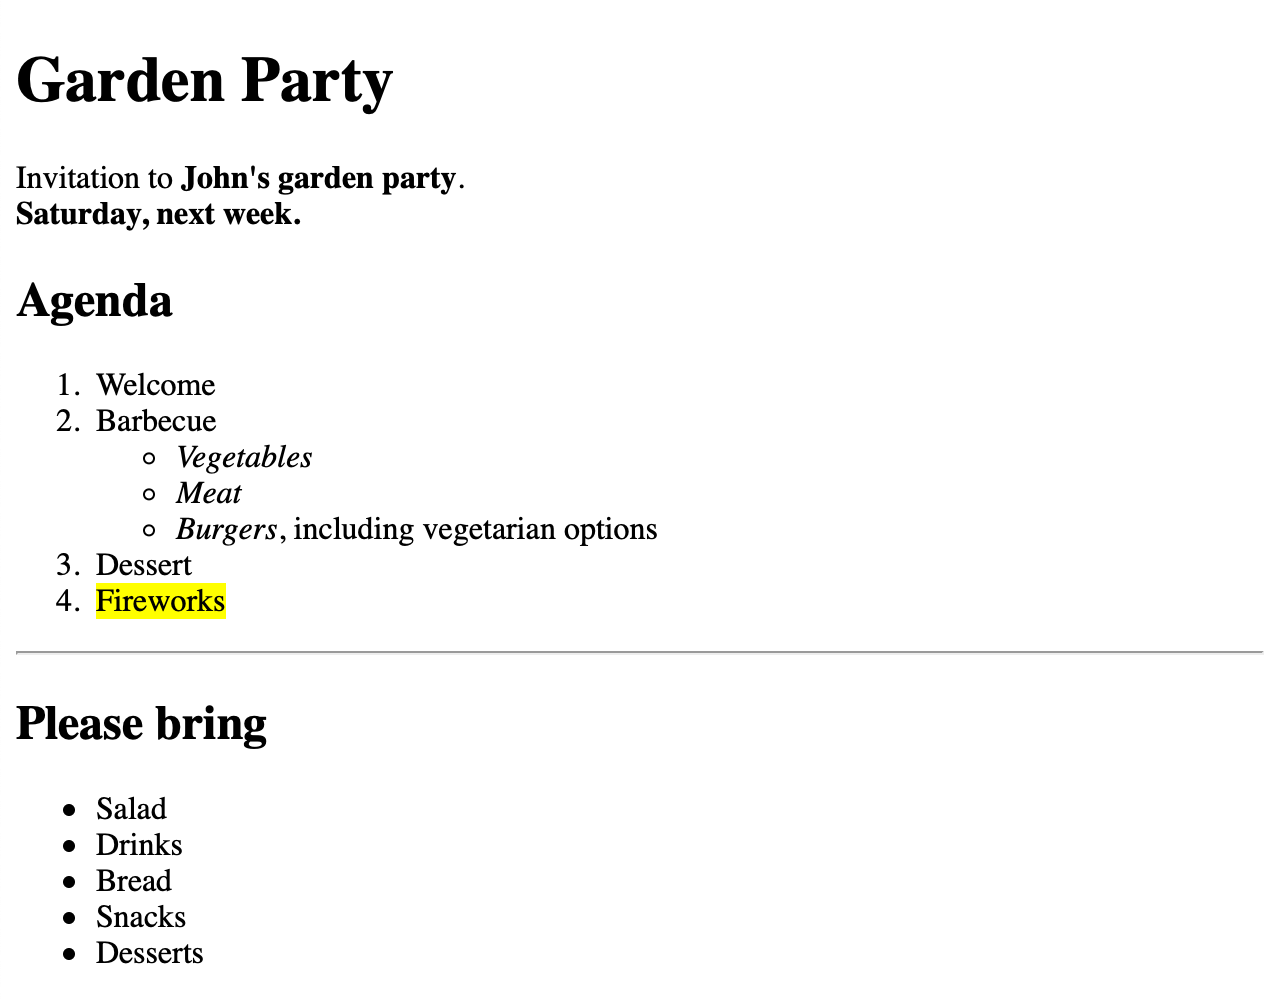
In this sample HTML document, the most important information regarding the garden party itself is marked as important using the <strong> element. Foods that are available for the barbecue are emphasized using the <em> element. The fireworks are simply highlighted using the <mark> element.
As an exercise, you can try formatting other pieces of text using the other formatting elements as well.
Preformatted Text
In most HTML elements, white space is usually reduced to a single space or even ignored entirely. However, there is an HTML element named <pre> that lets you define so-called preformatted text. White space in the content of this element, including spaces and line breaks, is preserved and rendered in the web browser. Additionally, the text is displayed in a fixed-width font, similar to the <code> element.
<pre>
field() {
  shift $1 ; echo $1
}
</pre>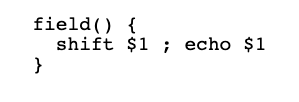
<pre> HTML element preserves white space.Grouping Elements
By convention, HTML elements are divided into two categories:
- Block-Level Elements
-
These appear on a new line and take up the entire available width. Examples of block-level elements that we already discussed are
<p>,<ol>, and<h2>. - Inline-Level Elements
-
These appear in the same line as other elements and text, taking up only as much space as their content requires. Examples of inline-level elements are
<strong>,<em>, and<i>.
|
Note
|
HTML5 has introduced more accurate and precise element categories, trying to avoid confusion with CSS block and inline boxes. For simplicity, we will stick here to the conventional subdivision into block and inline elements. |
The fundamental elements for grouping multiple elements together are the <div> and <span> elements.
The <div> element is a block-level container for other HTML elements and does not add semantic value by itself. You can use this element to divide an HTML document into sections and structure your content, both for code readability and to apply CSS styles to a group of elements, as you will learn in a later lesson.
By default, web browsers always insert a line break before and after each <div> element so that each is displayed on its own line.
In contrast, the <span> element is used as a container for HTML text and is generally used to group other inline elements in order to apply styles using CSS to a smaller portion of text.
The <span> element behaves just like regular text and does not start on a new line. It is therefore an inline element.
The following example compares the visual representation of the semantic <p> element and the grouping elements <div> and <span>:
<p>Text within a paragraph</p>
<p>Another paragraph of text</p>
<hr>
<div>Text wrapped within a <code>div</code> element</div>
<div>Another <code>div</code> element with more text</div>
<hr>
<span>Span content</span>
<span>and more span content</span>
A web browser renders this code as shown in Figure 21.

We already saw that by default, the web browser adds spacing before and after <p> elements. This spacing is not applied to either of the grouping elements <div> and <span>. However, <div> elements are formatted as their own blocks, while the text in <span> elements is shown in the same line.
HTML Page Structure
We have discussed how to use HTML elements to describe the content of a web page semantically–in other words, to convey meaning and context to the text. Another group of elements are designed for the purpose of describing the semantic structure of a web page, an expression or its structure. These elements are block elements, i.e., they visually behave similarly to a <div> element. Their purpose is to define the semantic structure of a web page by specifying well-defined areas such as headers, footers and the page’s main content. These elements allow the semantic grouping of content so that it may be understood by a computer as well, including search engines and screen readers.
The <header> Element
The <header> element contains introductory information to the surrounding semantic element within an HTML document. A header is different from a heading, but a header often includes a heading element (<h1>, … , <h6>).
In practice, this element is most often used to represent the page header, such as a banner with a logo. It can also be used to introduce the content for any of the following elements: <body>, <section>, <article>, <nav>, or <aside>.
A document may have multiple <header> elements, but a <header> element cannot be nested within another <header> element. Neither can a <footer> element be used within a <header>.
For example, to add a page header to our example document, we can do the following:
<header>
  <h1>Garden Party</h1>
</header>
There will be no visible changes to the HTML document, as <h1> (like all other heading elements) is a block-level element with no further visual properties.
The <main> Content Element
The <main> element is a container for the central content of a web page. There must be no more than one <main> element in an HTML document.
In our example document, all the HTML code we have written so far would be placed inside the <main> element.
<main>
  <header>
    <h1>Garden Party</h1>
  </header>
  <p>
    Invitation to <strong>John's garden party</strong>.<br>
    <strong>Saturday, next week.</strong>
  </p>

  <h2>Agenda</h2>
  <ol>
    <li>Welcome</li>
    <li>
      Barbecue
      <ul>
        <li><em>Vegetables</em></li>
        <li><em>Meat</em></li>
        <li><em>Burgers</em>, including vegetarian options</li>
      </ul>
    </li>
    <li>Dessert</li>
    <li><mark>Fireworks</mark></li>
  </ol>

  <hr>

  <h2>Please bring</h2>
  <ul>
    <li>Salad</li>
    <li>Drinks</li>
    <li>Bread</li>
    <li>Snacks</li>
    <li>Desserts</li>
  </ul>
</main>
Like the <header> element, the <main> element does not cause any visual changes in our example.
The <footer> Element
The <footer> element contains footnotes, for example authorship information, contact information, or related documents, for its surrounding semantic element, e.g. <section>, <nav>, or <aside>. A document can have multiple <footer> elements that allow you to better describe semantic elements. However, a <footer> element cannot be nested within another <footer> element, nor can a <header> element be used within a <footer>.
For our example, we can add contact information for the host (John) as shown in the following example:
<footer>
  <p>John Doe</p>
  <p>john.doe@example.com</p>
</footer>
The <nav> Element
The <nav> element describes a major navigational unit, such as a menu, that contains a series of hyperlinks.
|
Note
|
Not all hyperlinks must be wrapped within a |
Because hyperlinks have not yet been covered, the navigation element will not be included in this lesson’s example.
The <aside> Element
The <aside> element is a container for content that is not necessary within the ordering of the main page content, but is usually indirectly related or supplementary. This element is often used for sidebars that display secondary information, such as a glossary.
For our example, we can add address and journey information, which are only indirectly related to the remaining content, using the <aside> element.
<aside>
  <p>
    10, Main Street<br>
    Newville
  </p>
  <p>Parking spaces available.</p>
</aside>
The <section> Element
The <section> element defines a logical section in a document that is part of the surrounding semantic element, but would not work as stand-alone content, such as a chapter.
In our example document, we can wrap the content sections for the agenda and bring in list sections as shown in the following example:
<section>
  <header>
    <h2>Agenda</h2>
  </header>
  <ol>
    <li>Welcome</li>
    <li>
      Barbecue
      <ul>
        <li><em>Vegetables</em></li>
        <li><em>Meat</em></li>
        <li><em>Burgers</em>, including vegetarian options</li>
      </ul>
    </li>
    <li>Dessert</li>
    <li><mark>Fireworks</mark></li>
  </ol>
</section>

<hr>

<section>
  <header>
    <h2>Please bring</h2>
  </header>
  <ul>
    <li>Salad</li>
    <li>Drinks</li>
    <li>Bread</li>
    <li>Snacks</li>
    <li>Desserts</li>
  </ul>
</section>
This example also adds further <header> elements within the sections, so that each section is within its own <header> element.
The <article> Element
The <article> element defines independent and standalone content that makes sense on its own without the rest of the page. Its content is potentially redistributable or reusable in another context. Typical examples or material appropriate for an <article> element are a blog posting, a product listing for a shop, and an advertisement for a product. The advertisement could then exist both on its own and within a larger page.
In our example, we can replace the first <section> that wraps the agenda with an <article> element.
<article>
  <header>
    <h2>Agenda</h2>
  </header>
  <ol>
    <li>Welcome</li>
    <li>
      Barbecue
      <ul>
        <li><em>Vegetables</em></li>
        <li><em>Meat</em></li>
        <li><em>Burgers</em>, including vegetarian options</li>
      </ul>
    </li>
    <li>Dessert</li>
    <li><mark>Fireworks</mark></li>
  </ol>
</article>
The <header> element we added in the previous example may persist here as well, because <article> elements may have their own <header> elements.
The Final Example
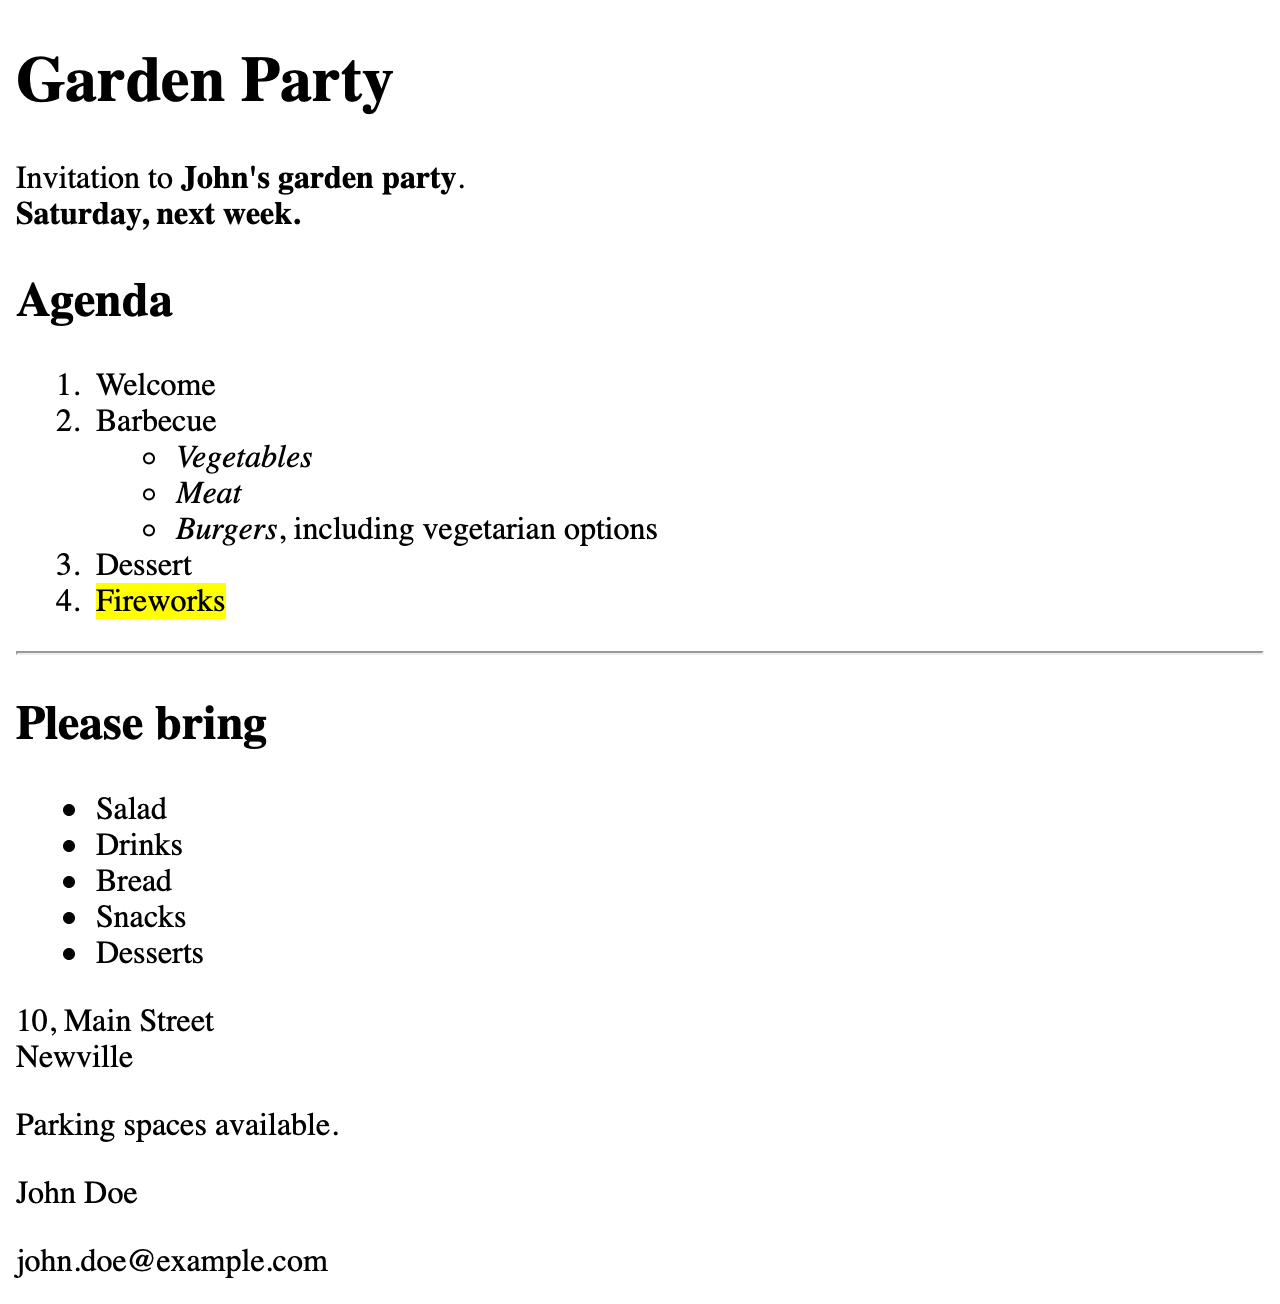
Combining all previous examples, the final HTML document for our invitation looks as follows:
<!DOCTYPE html>
<html lang="en">
  <head>
    <title>Garden Party</title>
  </head>

  <body>
    <main>
      <h1>Garden Party</h1>
      <p>
        Invitation to <strong>John's garden party</strong>.<br>
        <strong>Saturday, next week.</strong>
      </p>

      <article>
        <h2>Agenda</h2>
        <ol>
          <li>Welcome</li>
          <li>
            Barbecue
            <ul>
              <li><em>Vegetables</em></li>
              <li><em>Meat</em></li>
              <li><em>Burgers</em>, including vegetarian options</li>
            </ul>
          </li>
          <li>Dessert</li>
          <li><mark>Fireworks</mark></li>
        </ol>
      </article>

      <hr>

      <section>
        <h2>Please bring</h2>
        <ul>
          <li>Salad</li>
          <li>Drinks</li>
          <li>Bread</li>
          <li>Snacks</li>
          <li>Desserts</li>
        </ul>
      </section>
    </main>

    <aside>
      <p>
        10, Main Street<br>
        Newville
      </p>
      <p>Parking spaces available.</p>
    </aside>

    <footer>
      <p>John Doe</p>
      <p>john.doe@example.com</p>
    </footer>
  </body>
</html>
In a web browser, the whole page is rendered as shown in Figure 22.
Guided Exercises
-
For each of the following tags, indicate the corresponding closing tag:
<h5><br><ol><dd><hr><strong><tt><main> -
For each of the following tags, indicate whether it marks the beginning of a block or inline element:
<h3><span><b><div><em><dl><li><nav><code><pre> -
What kind of lists can you create in HTML? Which tags should you use for each of them?
-
What tags enclose the block elements that you can use to structure an HTML page?
Explorational Exercises
-
Create a basic HTML page with the title “Form Rules”. You will use this HTML page for all explorational exercises, each of which is based on the previous ones. Then add a level 1 heading with the text “How to fill in the request form”, a paragraph with the text “To receive the PDF document with the complete HTML course, it is necessary to fill in the following fields:” and an unordered list with the following list items: “Name”, “Surname”, “Email Address”, “Nation”, “Country”, and “Zip/Postal Code”.
-
Put the first three fields (“Name”, “Surname”, and “Email Address”) in bold, while also adding semantic importance. Then add a level 2 heading with the text “Required fields” and a paragraph with the text “Bold fields are mandatory.”
-
Add another level 2 heading with the text “Steps to follow”, a paragraph with the text “There are four steps to follow:”, and an ordered list with the following list items: “Fill in the fields”, “Click the Submit button”, “Check your e-mail and confirm your request by clicking on the link you receive”, and “Check your e-mail - You will receive the full HTML course in minutes”.
-
Using
<div>, create a block for each section that starts with a level 2 heading. -
Using
<div>, create another block for the section starting with the level 1 heading. Then divide this section from the other two with an horizontal line. -
Add the header element with the text “Form Rules - 2021” and the footer element with the text “Copyright Note - 2021”. Finally, add the main element that must contain the three
<div>blocks.
Summary
In this lesson you learned:
-
How to create markup for contents in an HTML document
-
The hierarchical HTML text structure
-
The difference between block and inline HTML elements
-
How to create HTML documents with a semantic structure
The following terms were discussed in this lesson:
<h1>,<h2>,<h3>,<h4>,<h5>,<h6>-
The heading tags.
<p>-
The paragraph tag.
<ol>-
The ordered list tag.
<ul>-
The unordered list tag.
<li>-
The list item tag.
<dl>-
The description list tag.
<dt>,<dd>-
The tags of each term and description for a description list.
<pre>-
The preserve formatting tag.
<b>,<i>,<u>,<tt>,<em>,<strong>,<code>,<mark>-
The formatting tags.
<div>,<span>-
The grouping tags.
<header>,<main>,<nav>,<aside>,<footer>-
The tags used to provide a simple structure and layout to an HTML page.
Answers to Guided Exercises
-
For each of the following tags, indicate the corresponding closing tag:
<h5></h5><br>Does not exist
<ol></ol><dd></dd><hr>Does not exist
<strong></strong><tt></tt><main></main> -
For each of the following tags, indicate whether it marks the beginning of a block or inline element:
<h3>Block Element
<span>Inline Element
<b>Inline Element
<div>Block Element
<em>Inline Element
<dl>Block Element
<li>Block Element
<nav>Block Element
<code>Inline Element
<pre>Block Element
-
What kind of lists can you create in HTML? Which tags should you use for each of them?
In HTML, you can create three types of lists: ordered lists consisting of a series of numbered list items, unordered lists consisting of a series of list items that have no special order or sequence, and description lists representing entries as in a dictionary or encyclopedia. An ordered list is enclosed between the
<ol>and</ol>tags, an unordered list is enclosed between the<ul>and</ul>tags, and a description list is enclosed between the<dl>and</dl>tags. Each item in an ordered or unordered list is enclosed between the<li>and</li>tags, while each term in a description list is enclosed between the<dt>and</dt>tags and its description is enclosed between the<dd>and</dd>tags. -
What tags enclose the block elements that you can use to structure an HTML page?
The
<header>and</header>tags enclose the page header, the<main>and</main>tags enclose the main content of the HTML page, the<nav>and</nav>tags enclose the so-called navigation bar, the<aside>and</aside>tags enclose the sidebar, and the<footer>and</footer>tags enclose the page footer.
Answers to Explorational Exercises
-
Create a basic HTML page with the title “Form Rules”. You will use this HTML page for all explorational exercises, each of which is based on the previous ones. Then add a level 1 heading with the text “How to fill in the request form”, a paragraph with the text “To receive the PDF document with the complete HTML course, it is necessary to fill in the following fields:” and an unordered list with the following list items: “Name”, “Surname”, “Email Address”, “Nation”, “Country”, and “Zip/Postal Code”.
<!DOCTYPE html> <html> <head> <title>Form Rules</title> </head> <body> <h1>How to fill in the request form</h1> <p> To receive the PDF document with the complete HTML course, it is necessary to fill in the following fields: </p> <ul> <li>Name</li> <li>Surname</li> <li>Email Address</li> <li>Nation</li> <li>Country</li> <li>Zip/Postal Code</li> </ul> </body> </html> -
Put the first three fields (“Name”, “Surname”, and “Email Address”) in bold, while also adding semantic importance. Then add a level 2 heading with the text “Required fields” and a paragraph with the text “Bold fields are mandatory.”
<!DOCTYPE html> <html> <head> <title>Form Rules</title> </head> <body> <h1>How to fill in the request form</h1> <p> To receive the PDF document with the complete HTML course, it is necessary to fill in the following fields: </p> <ul> <li><strong> Name </strong></li> <li><strong> Surname </strong></li> <li><strong> Email Address </strong></li> <li>Nation</li> <li>Country</li> <li>Zip/Postal Code</li> </ul> <h2>Required fields</h2> <p>Bold fields are mandatory.</p> </body> </html> -
Add another level 2 heading with the text “Steps to follow”, a paragraph with the text “There are four steps to follow:”, and an ordered list with the following list items: “Fill in the fields”, “Click the Submit button”, “Check your e-mail and confirm your request by clicking on the link you receive”, and “Check your e-mail - You will receive the full HTML course in minutes”.
<!DOCTYPE html> <html> <head> <title>Form Rules</title> </head> <body> <h1>How to fill in the request form</h1> <p> To receive the PDF document with the complete HTML course, it is necessary to fill in the following fields: </p> <ul> <li><strong> Name </strong></li> <li><strong> Surname </strong></li> <li><strong> Email Address </strong></li> <li>Nation</li> <li>Country</li> <li>Zip/Postal Code</li> </ul> <h2>Required fields</h2> <p>Bold fields are mandatory.</p> <h2>Steps to follow</h2> <p>There are four steps to follow:</p> <ol> <li>Fill in the fields</li> <li>Click the Submit button</li> <li> Check your e-mail and confirm your request by clicking on the link you receive </li> <li> Check your e-mail - You will receive the full HTML course in minutes </li> </ol> </body> </html> -
Using
<div>, create a block for each section that starts with a level 2 heading.<!DOCTYPE html> <html> <head> <title>Form Rules</title> </head> <body> <h1>How to fill in the request form</h1> <p> To receive the PDF document with the complete HTML course, it is necessary to fill in the following fields: </p> <ul> <li><strong> Name </strong></li> <li><strong> Surname </strong></li> <li><strong> Email Address </strong></li> <li>Nation</li> <li>Country</li> <li>Zip/Postal Code</li> </ul> <div> <h2>Required fields</h2> <p>Bold fields are mandatory.</p> </div> <div> <h2>Steps to follow</h2> <p>There are four steps to follow:</p> <ol> <li>Fill in the fields</li> <li>Click the Submit button</li> <li> Check your e-mail and confirm your request by clicking on the link you receive </li> <li> Check your e-mail - You will receive the full HTML course in minutes </li> </ol> </div> </body> </html> -
Using
<div>, create another block for the section starting with the level 1 heading. Then divide this section from the other two with an horizontal line.<!DOCTYPE html> <html> <head> <title>Form Rules</title> </head> <body> <div> <h1>How to fill in the request form</h1> <p> To receive the PDF document with the complete HTML course, it is necessary to fill in the following fields: </p> <ul> <li><strong> Name </strong></li> <li><strong> Surname </strong></li> <li><strong> Email Address </strong></li> <li>Nation</li> <li>Country</li> <li>Zip/Postal Code</li> </ul> </div> <hr> <div> <h2>Required fields</h2> <p>Bold fields are mandatory.</p> </div> <div> <h2>Steps to follow</h2> <p>There are four steps to follow:</p> <ol> <li>Fill in the fields</li> <li>Click the Submit button</li> <li> Check your e-mail and confirm your request by clicking on the link you receive </li> <li> Check your e-mail - You will receive the full HTML course in minutes </li> </ol> </div> </body> </html> -
Add the header element with the text “Form Rules - 2021” and the footer element with the text “Copyright Note - 2021”. Finally, add the main element that must contain the three
<div>blocks.<!DOCTYPE html> <html> <head> <title>Form Rules</title> </head> <body> <header> <h1>Form Rules - 2021</h1> </header> <main> <div> <h1>How to fill in the request form</h1> <p> To receive the PDF document with the complete HTML course, it is necessary to fill in the following fields: </p> <ul> <li><strong> Name </strong></li> <li><strong> Surname </strong></li> <li><strong> Email Address </strong></li> <li>Nation</li> <li>Country</li> <li>Zip/Postal Code</li> </ul> </div> <hr> <div> <h2>Required fields</h2> <p>Bold fields are mandatory.</p> </div> <div> <h2>Steps to follow</h2> <p>There are four steps to follow:</p> <ol> <li>Fill in the fields</li> <li>Click the Submit button</li> <li> Check your e-mail and confirm your request by clicking on the link you receive </li> <li> Check your e-mail - You will receive the full HTML course in minutes </li> </ol> </div> </main> <footer> <p>Copyright Note - 2021</p> </footer> </body> </html>