033.1 Lesson 1
Certificate: |
Web Development Essentials |
|---|---|
Version: |
1.0 |
Topic: |
033 CSS Content Styling |
Objective: |
033.1 CSS Basics |
Lesson: |
1 of 1 |
Introduction
All web browsers render HTML pages using default presentation rules that are practical and straightforward, but not visually appealing. HTML by itself offers few features to write elaborate pages based on modern user experience concepts. After writing simple HTML pages, you have probably realized they are unsightly when compared to well-designed pages found on the Internet. This is because, in modern HTML, the markup code intended for the structure and function of the elements in the document (i.e., the semantic content) is separate from the rules that define how the elements should look (the presentation). The rules for presentation are written in a different language called Cascading Style Sheets (CSS). It lets you change almost all the document’s visual aspects, such as fonts, colors, and the placement of the elements along the page.
HTML documents are not, in most cases, intended to be displayed in a fixed layout like a PDF file. Rather, HTML-based web pages will probably be rendered on a wide variety of screen sizes or even be printed. CSS provides tunable options to ensure that the web page will be rendered as intended, adjusted to the device or application that opens it.
Applying Styles
There are several ways to including CSS in an HTML document: write it directly in the element’s tag, in a separate section of the page’s source code, or in an external file to be referenced by the HTML page.
The style Attribute
The simplest way to modify the style of a specific element is to write it directly in the element tag using the style attribute. All visible HTML elements allow a style attribute, whose value may be one or more CSS rules, also known as properties. Let’s start with a simple example, a paragraph element:
<p>My stylized paragraph</p>The basic syntax of a customized CSS property is property: value, where property is the particular aspect you want to change in the element and value defines the replacement for the default option made by the browser. Some properties apply to all elements and some properties apply only to specific elements. Likewise, there are appropriate values to be used in each property.
To change the color of our plain paragraph, for example, we use the color property. The color property refers to the foreground color, that is, the color of the letters in the paragraph. The color itself goes in the value part of the rule and it can be specified in many different formats, including simple names like red, green, blue, yellow, etc. Thus, to make the letter of the paragraph purple, add the customized property color: purple to the style attribute of the element:
<p style="color: purple">My first stylized paragraph</p>Other customized properties can go in the same style property, but they must be separated by semicolons. If you want to make the font size larger, for example, add font-size: larger to the style property:
<p style="color: purple; font-size: larger">My first stylized paragraph</p>|
Note
|
It’s not necessary to add spaces around the colons and semicolons, but they can make it easier to read the CSS code. |
To see the result of these changes, save the following HTML in a file and then open it in a web browser (results are shown in Figure 1):
<!DOCTYPE html>
<html>
<head>
  <meta charset="utf-8" />
  <title>CSS Basics</title>
</head>
<body>

<p style="color: purple; font-size: larger">My first stylized paragraph</p>

<p style="color: green; font-size: larger">My second stylized paragraph</p>

</body>
</html>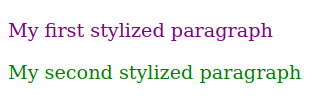
You can imagine every element in the page as a rectangle or a box whose geometric properties and decorations you can manipulate with CSS. The rendering mechanism uses two basic standard concepts for element placement: block placement and inline placement. Block elements occupy all the horizontal space of their parent element and are placed sequentially, from top to bottom. Their height (their vertical dimension, not to be confused with their top position in the page) generally depends on the amount of content they have. Inline elements follow the left-to-right method similar to Western written languages: elements are placed horizontally, from left to right, until there is no more space in the right side, whereupon the element continues on a new line just under the current one. Elements such as p, div, and section are placed as blocks by default, whereas elements such as span, em, a, and single letters are placed inline. These basic placement methods can be fundamentally modified by CSS rules.
The rectangle corresponding to the p element in the body of the sample HTML document will be visible if you add the background-color property to the rule (Figure 2):
<p style="color: purple; font-size: larger; background-color: silver">My first stylized paragraph</p>

<p style="color: green; font-size: larger; background-color: silver">My second stylized paragraph</p>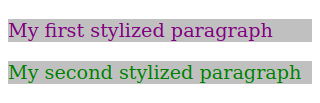
As you add new CSS customized properties to the style attribute, you’ll note that the overall code starts to get cluttered. Writing too many CSS rules in the style attribute undermines the separation of structure (HTML) and presentation (CSS). Moreover, you’ll soon realize that many styles are shared among different elements and it is not wise to repeat them in every element.
CSS Rules
Rather than styling the elements directly in their style attributes, it is much more practical to tell the browser about the entire collection of elements to which the custom style applies. We do it by adding a selector to the customized properties, matching elements by type, class, unique ID, relative position, etc. The combination of a selector and corresponding customized properties — also known as declarations — is called a CSS rule. The basic syntax of a CSS rule is selector { property: value }. As in the style attribute, properties separated by semicolons can be grouped together, as in p { color: purple; font-size: larger }. This rule matches every p element in the page and applies the customized color and font-size properties.
A CSS rule for a parent element will automatically match all its children elements. This means that we could apply the customized properties to all text in the page, regardless of whether it is inside or outside a <p> tag, by using the body selector instead: body { color: purple; font-size: larger }. This strategy frees us from writing the same rule again for all its children, but it may be necessary to write additional rules to “undo” or to modify the inherited rules.
The style Tag
The <style> tag lets us write CSS rules inside the HTML page we want to style. It allows the browser to differentiate the CSS code from the HTML code. The <style> tag goes in the head section of the document:
<!DOCTYPE html>
<html>
<head>
  <meta charset="utf-8" />
  <title>CSS Basics</title>

  <style type="text/css">

  p { color: purple; font-size: larger }

  </style>

</head>
<body>

<p>My first stylized paragraph</p>

<p>My second stylized paragraph</p>

</body>
</html>
The type attribute tells the browser what kind of content is inside the <style> tag, i.e. its MIME type. Because every browser that supports CSS assumes that the type of the <style> tag is text/css by default, including the type attribute is optional. There is also a media attribute that indicates the media — computer screens or printing, for example — to which the CSS rules in the <style> tag apply. By default, the CSS rules apply to any medium where the document is rendered.
As in HTML code, line breaks and code indentation do not change how the CSS rules are interpreted by the browser. Writing:
<style type="text/css">

p { color: purple; font-size: larger }

</style>
has the exact same result as writing:
<style type="text/css">

p {
  color: purple;
  font-size: larger;
}

</style>
The extra bytes used by the spaces and line-breaks make little difference in the final size of the document and do not have a significant impact on page’s loading time, so the choice of layout is a matter of taste. Note the semicolon after the last declaration (font-size: larger;) of the CSS rule. That semicolon is not mandatory, but having it there makes it easier to add another declaration in the next line without worrying about missing semicolons.
Having the declarations in separate lines also helps when you need to comment out a declaration. Whenever you want to temporarily disable a declaration for troubleshooting reasons, for example, you can enclose the corresponding line with /* and */:
p {
  color: purple;
  /*
  font-size: larger;
  */
}
or:
p {
  color: purple;
  /* font-size: larger; */
}
Written like this, the font-size: larger declaration will be ignored by the browser. Be careful to open and close the comments properly, otherwise the browser may be not able to interpret the rules.
Comments are also useful to write reminders about the rules:
/* Texts inside <p> are purple and larger */
p {
  color: purple;
  font-size: larger;
}
Reminders like the one in the example are expendable in stylesheets containing a small number of rules, but they are essential to help navigate stylesheets with hundreds (or more) rules.
Even though the style attribute and the <style> tag are adequate for testing custom styles and useful for specific situations, they are not commonly used. Instead, CSS rules are usually kept in a separate file that can be referenced from the HTML document.
CSS in External Files
The preferred method to associate CSS definitions with an HTML document is to store the CSS in a separate file. This method offers two main advantages over the previous ones:
-
The same styling rules can be shared among distinct documents.
-
The CSS file is usually cached by the browser, improving future loading times.
CSS files have the .css extension and, like HTML files, they can be edited by any plain text editor. Unlike HTML files, CSS files have no top level structure built with hierarchical tags such as <head> or <body>. Rather, the CSS file is just a list of rules processed in sequential order by the browser. The same rules written inside a <style> tag could instead go in a CSS file.
The association between the HTML document and the CSS rules stored in a file is defined in the HTML document only. To the CSS file, it does not matter whether elements matching its rules exist, so there is no need to enumerate in the CSS file the HTML documents it is linked to. On the HTML side, every linked stylesheet will be applied to the document, just as if the rules were written in a <style> tag.
The <link> HTML tag defines an external stylesheet to be used in the current document and should go in the head section of the HTML document:
<head>
  <meta charset="utf-8" />
  <title>CSS Basics</title>

  <link href="style.css" rel="stylesheet">

</head>
Now you can place the rule for the p element we used before into the style.css file, and the results seen by the visitor to the web page will be the same. If the CSS file is not in the same directory as the HTML document, specify its relative or full path in the href attribute. The <link> tag can refer to different types of external resources, so it is important to establish what relationship the external resource has with the current document. For external CSS files, the relationship is defined in rel="stylesheet".
The media attribute can be used in the same way as for the <style> tag: it indicates the media, such as computer screens or printing, to which the rules in the external file should apply.
CSS can completely change an element, but it is still important to use the appropriate element for the components of the page. Otherwise, assistive technologies such as screen-readers may not be able to identify the correct sections of the page.
Guided Exercises
-
What methods can be used to change the appearance of HTML elements using CSS?
-
Why is it not recommended to use the
styleattribute of the<p>tag if there are sibling paragraphs that should look the same? -
What is the default placement policy for placing a
divelement? -
What attribute of the
<link>tag indicates the location of an external CSS file? -
What is the correct section to insert the
linkelement inside an HTML document?
Explorational Exercises
-
Why is it not recommended to use a
<div>tag to identify a word in an ordinary sentence? -
What happens if you start a comment with
/*in the middle of a CSS file, but forget to close it with*/? -
Write a CSS rule to draw an underline in all
emelements of the document. -
How can you indicate that a stylesheet from a
<style>or<link>tag should be used only by speech synthesizers?
Summary
This lesson covers the basic concepts of CSS and how to integrate it with HTML. Rules written in CSS stylesheets are the standard method to change the appearance of HTML documents. CSS allows us to keep the semantic content separate from the presentation policies. This lesson goes through the following concepts and procedures:
-
How to change CSS properties using the
styleattribute. -
The basic CSS rule syntax.
-
Using the
<style>tag to embed CSS rules in the document. -
Using the
<link>tag to incorporate external stylesheets to the document.
Answers to Guided Exercises
-
What methods can be used to change the appearance of HTML elements using CSS?
Three basic methods: Write it directly in the element’s tag, in a separate section of the page’s source code, or in an external file to be referenced by the HTML page.
-
Why is it not recommended to use the
styleattribute of the<p>tag if there are sibling paragraphs that should look the same?The CSS declaration will need to be replicated in the other
<p>tags, which is time consuming, increases the file size, and it is prone to errors. -
What is the default placement policy for placing a
divelement?The
divelement is treated as a block element by default, so it will occupy all the horizontal space of its parent element and its height will depend on its contents. -
What attribute of the
<link>tag indicates the location of an external CSS file?The
hrefattribute. -
What is the correct section to insert the
linkelement inside an HTML document?The
linkelement should be in theheadsection of the HTML document.
Answers to Explorational Exercises
-
Why it is not recommended to use a
<div>tag to identify a word in an ordinary sentence?The
<div>tag provides a semantic separation between two distinct sections of the document and interferes with accessibility tools when it is used for inline text elements. -
What happens if you start a comment with
/*in the middle of a CSS file, but forget to close it with*/?All the rules after the comment will be ignored by the browser.
-
Write a CSS rule to draw an underline in all
emelements of the document.em { text-decoration: underline }or
em { text-decoration-line: underline } -
How can you indicate that a stylesheet from a
<style>or<link>tag should be used only by speech synthesizers?The value of its
mediaattribute must bespeech.